At ARG, our development team works across different operating systems - some prefer macOS, others Linux, and many use Windows. This diverse setup created a challenge: how to maintain a consistent development environment across all platforms?
For our Windows developers, this meant finding a way to run the same Linux-based tools and containers that our Linux team members use natively. Windows Subsystem for Linux (WSL) has been our answer, providing a bridge between platforms.
The best part of our solution? We've eliminated the need for Docker Desktop on machines where its extra management features were not required. This guide shares our approach to setting up WSL 2 and installing Docker Engine directly inside a Linux distribution, giving Windows developers a familiar Linux container workflow. We'll also show you how to set up Portainer as a lightweight visual interface for Docker.
What's WSL All About?
WSL lets you run a Linux distribution directly from Windows without managing a traditional virtual machine or dual-boot setup. WSL 2 still uses a lightweight utility VM behind the scenes. There are two versions worth knowing about:
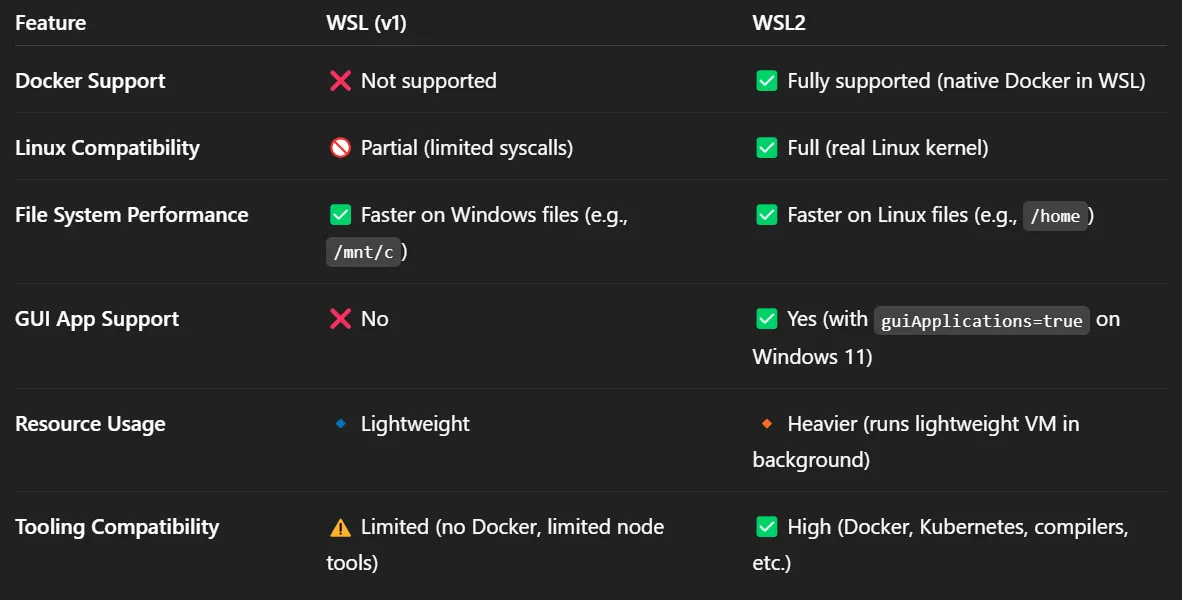
- WSL 1. Translates Linux system calls to Windows. It can be faster when Linux tools must access files stored on the Windows filesystem, but it has limited compatibility with container tools.
- WSL 2. Uses a lightweight VM with a full Linux kernel. This offers excellent compatibility with modern tools like Docker and Kubernetes.
Our recommendation? Go with WSL 2 - it's the default now for good reason and supports all the modern Linux tools you'll need. As Microsoft explains in its official documentation, WSL 2 provides a full Linux kernel experience right within Windows, making it perfect for container development.
This setup is for Linux containers. It does not replace Docker Desktop's Windows-container mode or features that are specific to Docker Desktop.
Setting Up WSL on Windows 10/11
Getting WSL up and running is straightforward. These commands require Windows 10 version 2004, build 19041 or newer, or Windows 11. Open PowerShell as Administrator and run:
wsl --installRestart Windows when prompted, then launch the installed distribution to create your Linux user. The one-command installation applies when WSL is not already installed.
Want to see what other distros are available?
wsl --list --online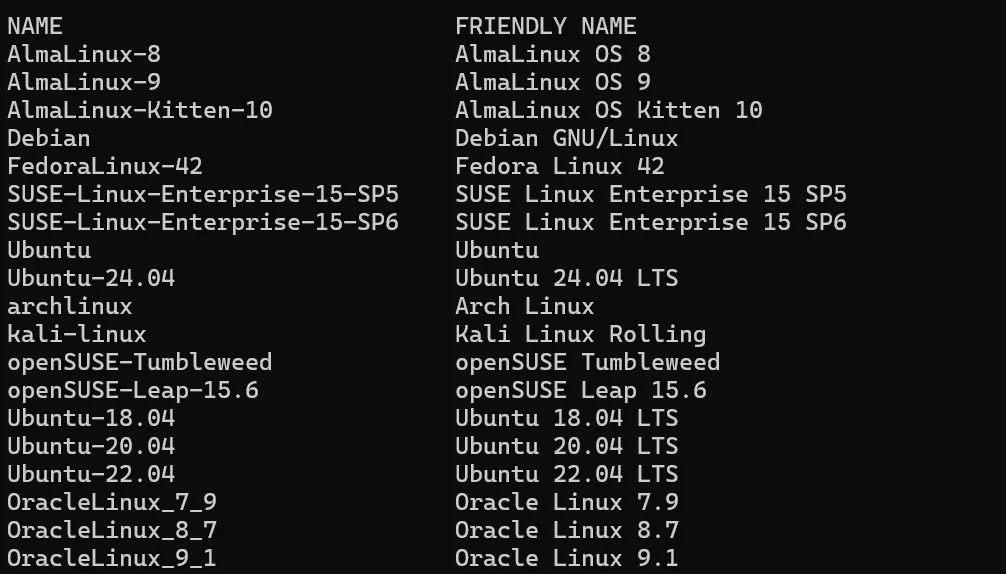
To install a specific one, such as Ubuntu 24.04:
wsl --install -d Ubuntu-24.04Once installed, set your default distro:
wsl --set-default <DistributionName>Why Skip Docker Desktop?
The Architectural Sandwich Problem
With the WSL 2 backend, Docker Desktop runs inside its isolated docker-desktop distribution and namespace within WSL's shared utility VM. It adds Desktop services, integration proxies, and management features, but it does not add a second VM on top of WSL 2. Docker Desktop's Hyper-V and Docker VMM backends use different architectures.
File System Performance Issues
One of the biggest bottlenecks is crossing between the Windows and Linux filesystems. When mounting Windows-based files into Linux containers, performance can degrade significantly compared with keeping projects and bind-mounted data in the WSL Linux filesystem. This recommendation applies whether you use Docker Desktop's WSL backend or a Docker Engine installed directly in your distribution.
Memory Consumption
Running Docker Engine directly removes Docker Desktop's UI and management services, which can reduce overhead on machines that do not need those features. Actual memory use depends on the workload, versions, idle state, and configuration. Cached-memory reclamation belongs to the shared WSL VM; WSL's autoMemoryReclaim setting can return unused page-cache memory to Windows.
Real-World Performance Differences
Performance depends heavily on the workload and where project files are stored. Keeping Linux-container projects in the WSL filesystem is usually more important than the choice of interface around the Docker daemon. Measure your own build, startup, and memory usage before choosing between a direct Engine installation and Docker Desktop.
Installing Docker in WSL
The commands below follow Docker's current instructions for supported Ubuntu releases. If you chose Debian or another distribution, use Docker's installation instructions for that distribution instead. Before using this approach, disable Docker Desktop integration for the distribution and stop Docker Desktop to avoid connecting the CLI to the wrong daemon.
# 1. Remove packages that conflict with Docker Engine
for pkg in docker.io docker-compose docker-compose-v2 docker-doc podman-docker containerd runc docker-buildx; do
  sudo apt remove -y "$pkg"
done

# 2. Add Docker's official signing key
sudo apt update
sudo apt install -y ca-certificates curl
sudo install -m 0755 -d /etc/apt/keyrings
sudo curl -fsSL https://download.docker.com/linux/ubuntu/gpg \
  -o /etc/apt/keyrings/docker.asc
sudo chmod a+r /etc/apt/keyrings/docker.asc

# 3. Add Docker's apt repository
sudo tee /etc/apt/sources.list.d/docker.sources > /dev/null <<EOF
Types: deb
URIs: https://download.docker.com/linux/ubuntu
Suites: $(. /etc/os-release && echo "${UBUNTU_CODENAME:-$VERSION_CODENAME}")
Components: stable
Architectures: $(dpkg --print-architecture)
Signed-By: /etc/apt/keyrings/docker.asc
EOF

# 4. Install Docker Engine and its plugins
sudo apt update
sudo apt install -y docker-ce docker-ce-cli containerd.io docker-buildx-plugin docker-compose-plugin

# 5. Start Docker now and on future distro launches
sudo systemctl enable --now docker
sudo systemctl status docker --no-pager

# 5. Optional: allow Docker commands without sudo
sudo usermod -aG docker $USER
Current Ubuntu distributions installed through wsl --install enable systemd by default. Older installations and some other distributions may require systemd to be enabled in /etc/wsl.conf before systemctl can manage Docker.
Important security note: membership in the docker group grants root-level privileges. Log out completely and back in, run newgrp docker, or terminate the distribution from PowerShell so group membership is re-evaluated. If that level of access is not appropriate, consider Docker's rootless mode instead. Then test Docker:
docker run hello-worldIf you see the "Hello from Docker!" message, you're ready to go.
Installing Portainer: A GUI for Docker
If you like visual tools for managing containers, Portainer is a lightweight alternative to Docker Desktop's interface:
# Create a Docker volume for Portainer data
docker volume create portainer_data

# Run Portainer for local access only
docker run -d -p 127.0.0.1:9443:9443 --name portainer \
  --restart=always \
  -v /var/run/docker.sock:/var/run/docker.sock \
  -v portainer_data:/data \
  portainer/portainer-ce:lts
Open your browser and go to https://localhost:9443 to access the Portainer interface. Portainer uses a self-signed certificate by default, so your browser will display a certificate warning. Run docker logs portainer, find the setup_token value, and use it during first-time setup within five minutes. You can then create the administrator account.
Mounting /var/run/docker.sock gives Portainer root-equivalent control over the Docker host. Only run a trusted Portainer image and do not expose the interface to untrusted networks. Port 8000 is only required for Portainer Edge Agents and is intentionally omitted here.
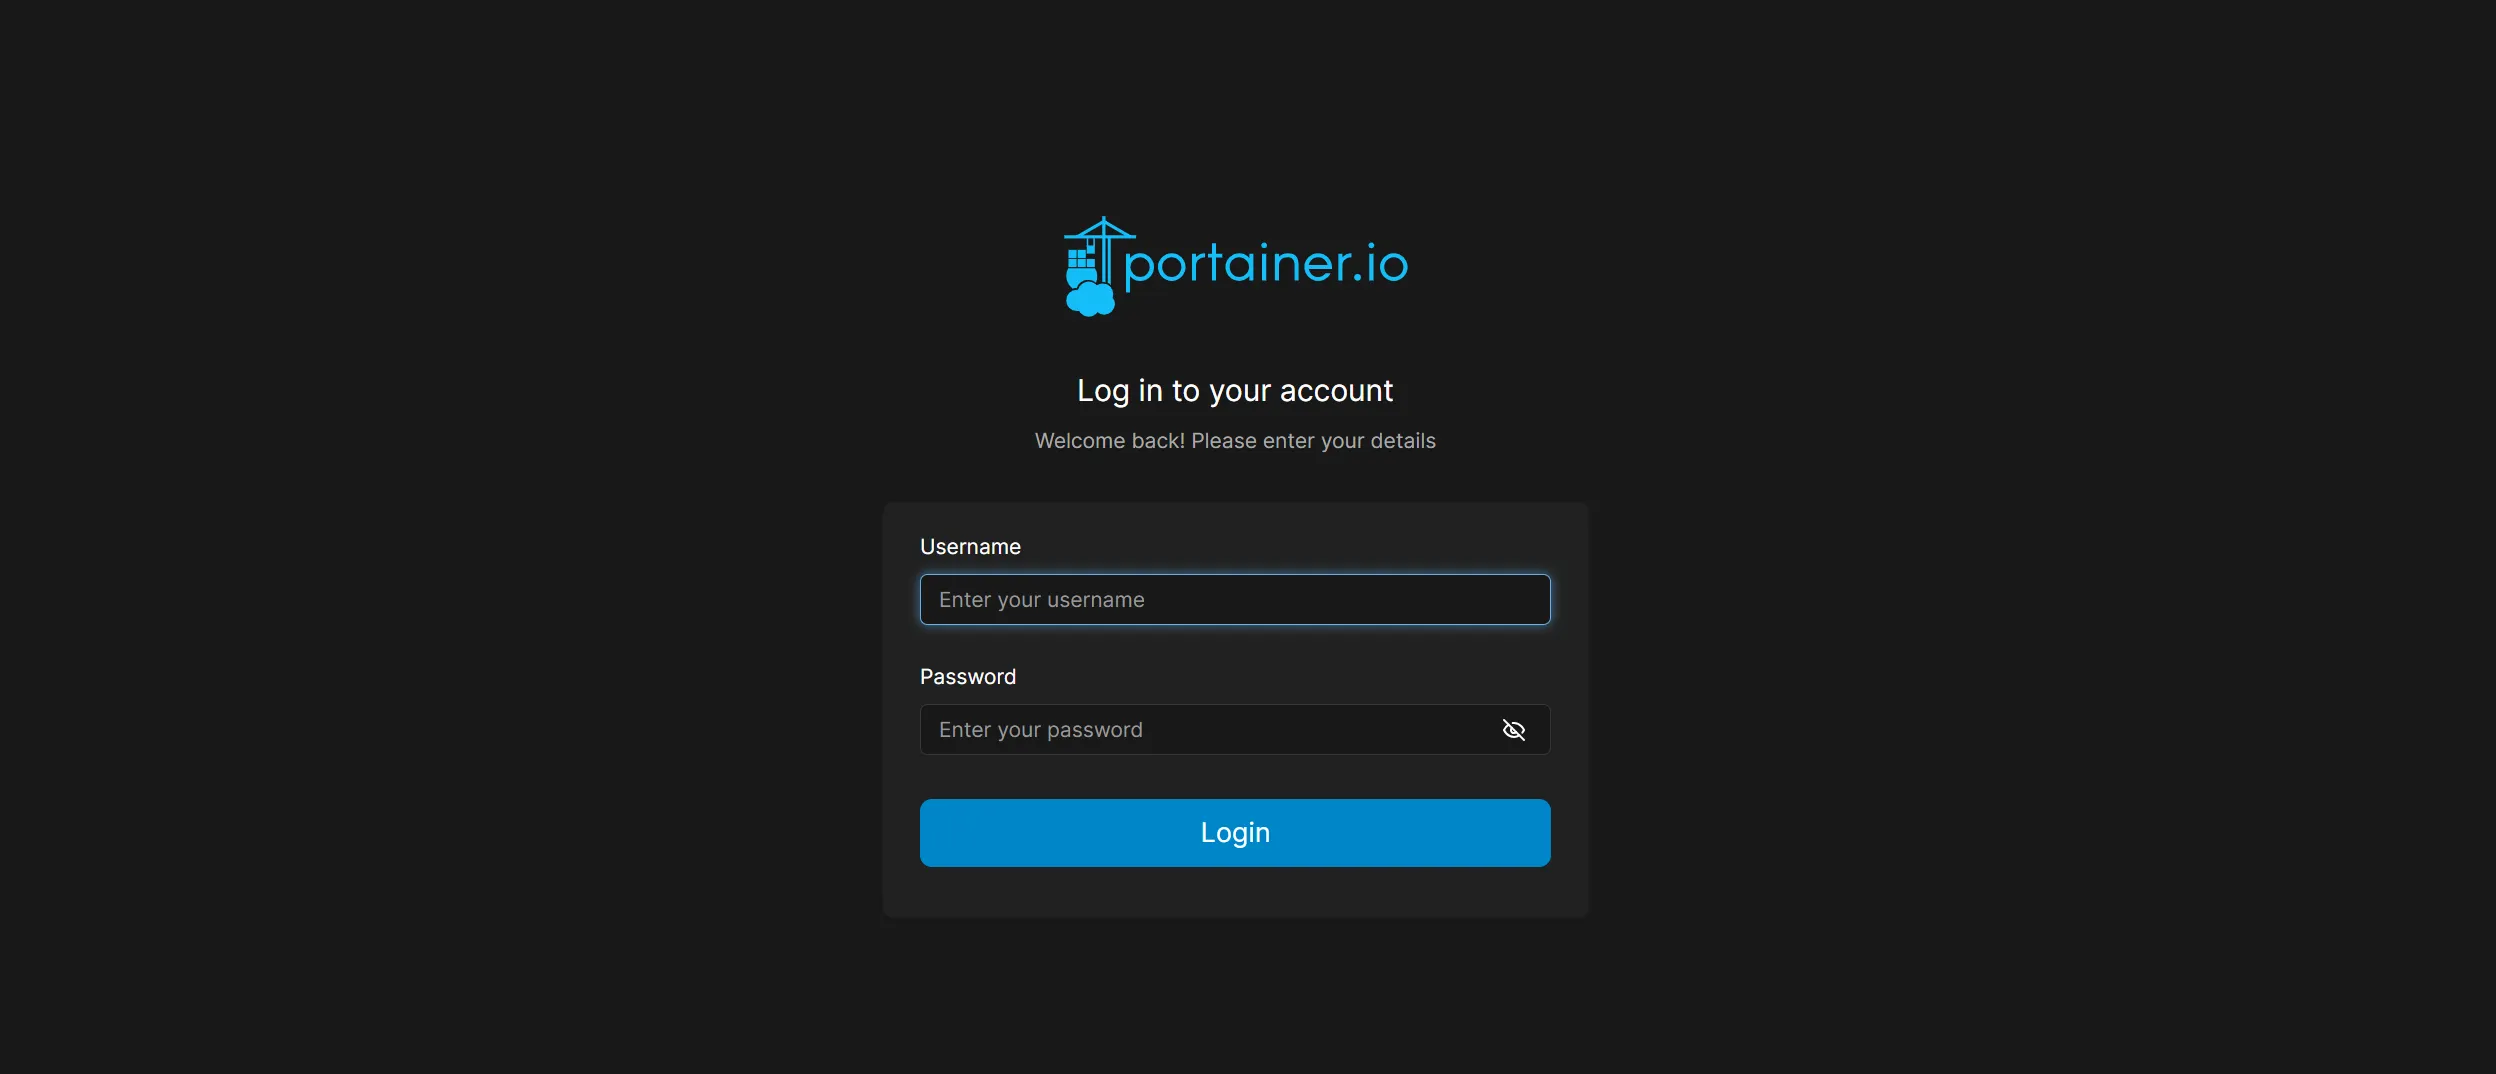
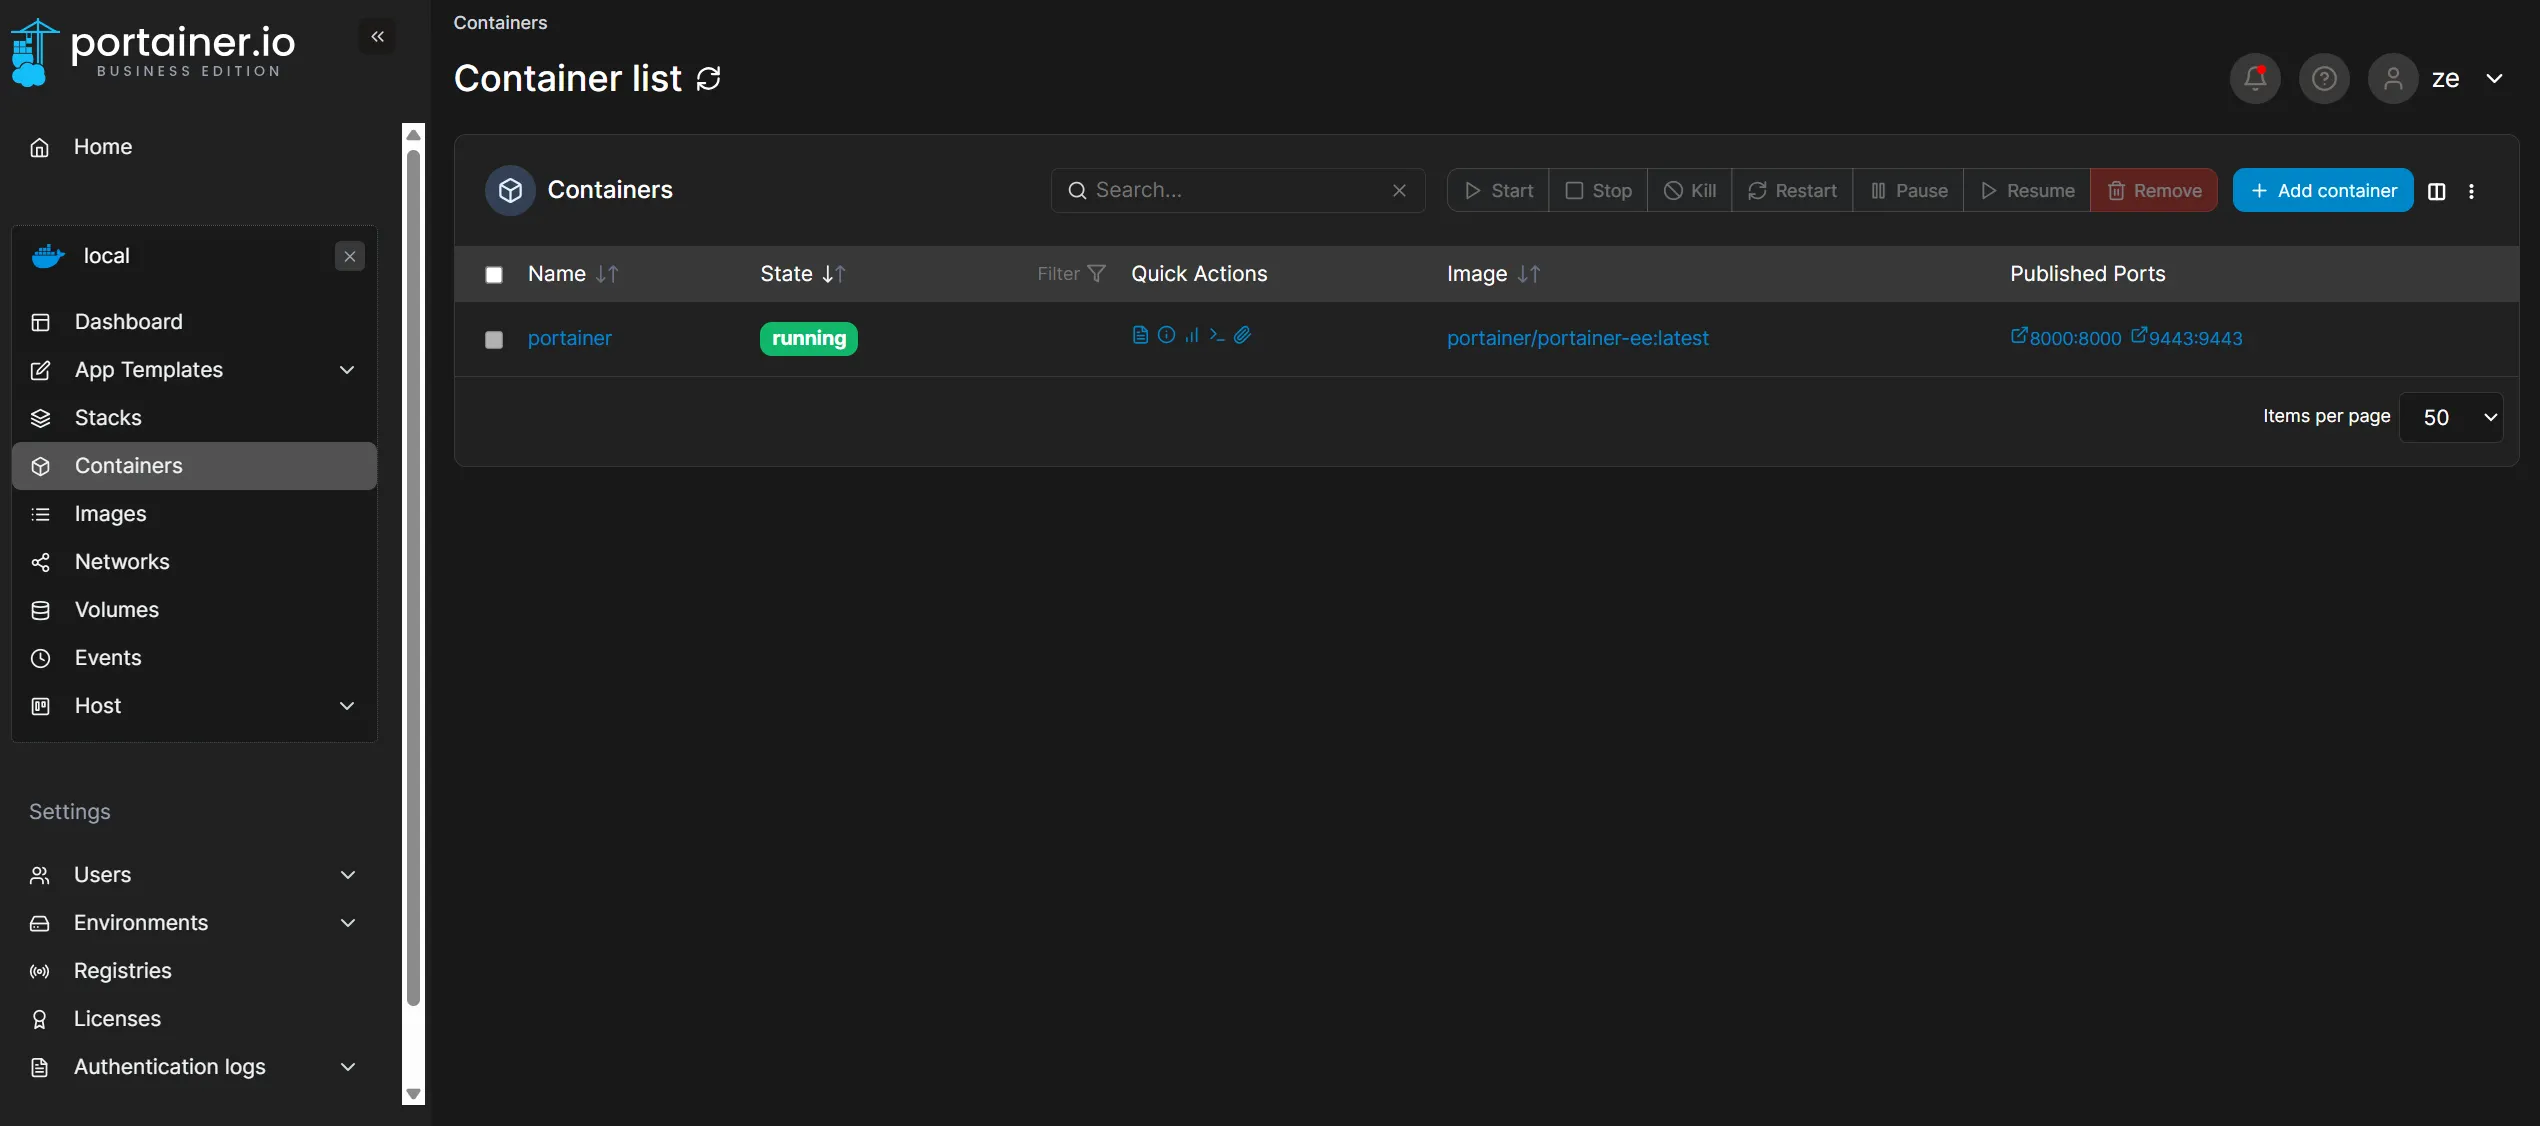
Developer tip: Portainer makes container management visual and intuitive. A distro-local Docker Engine and Portainer cover the core container-management workflow without requiring Docker Desktop.
Optional: Cap WSL 2 Resource Usage with .wslconfig
By default, WSL 2 can consume significant system resources depending on what you're running. You can control memory, CPU usage, and whether Linux GUI apps are supported by editing the .wslconfig file. These limits apply globally to the shared WSL 2 VM and affect every WSL 2 distribution. Lower limits reduce host resource consumption but can also slow container builds and other Linux workloads.
Create .wslconfig in your Windows user folder at C:\Users\<YourUsername>\.wslconfig and add the following configuration:
[wsl2]
memory=4GB
processors=2
guiApplications=false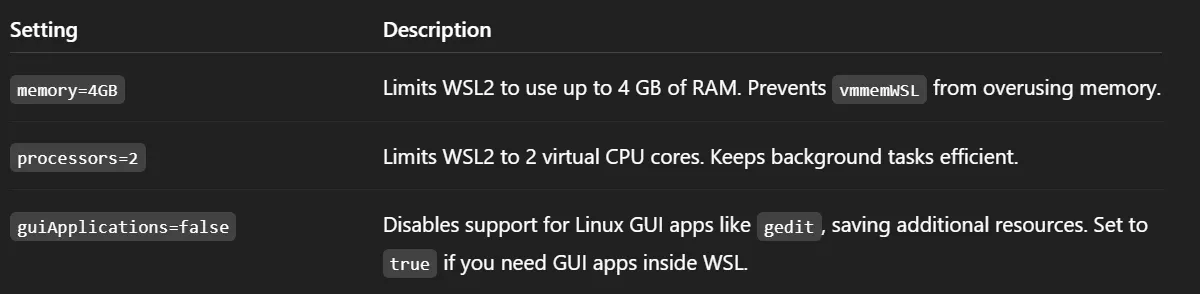
To apply the configuration, run:
wsl --shutdownThis stops all WSL instances and reloads the .wslconfig settings on the next launch.
Wrapping Up
You now have the best of both worlds - Windows for your desktop needs and a Linux environment for development. This setup removes Docker Desktop's UI and management services, but the practical resource and performance difference depends on your workload and configuration.
The beauty of this approach is that you're using the same Docker Engine and CLI model found on Linux servers, helping your development workflow more closely resemble production. With Portainer, you still get a clean web interface for managing your containers without installing Docker Desktop.
Happy coding across platforms! Follow us for more developer tips and development guides.